
How to Use Cisco Packet Tracer
Configuring DHCP service on a generic server in Packet Tracer.
Using Packet Tracer, you can create detailed projects by creating Network topologies or create a virtual environment of your existing
network with this software. Or if you are preparing for Cisco exams, you can work with this simulator software on all topics covered
by exam content such as routing protocols, VLANs.
After installing Packet Tracer on Windows, you can start preparing for Cisco exams by creating a network topology.
However, as you prepare for your exams, you need to know the tools and devices menus of this software and the drawing tools to create
a more descriptive project.
You can add network devices such as desktop computers, laptops, servers to the workspace and create a network connection between them.
Step 1: How to Add a PC
The simplest and most basic task in Packet Tracer is to add a PC to the workspace. To add a PC, click the section below.
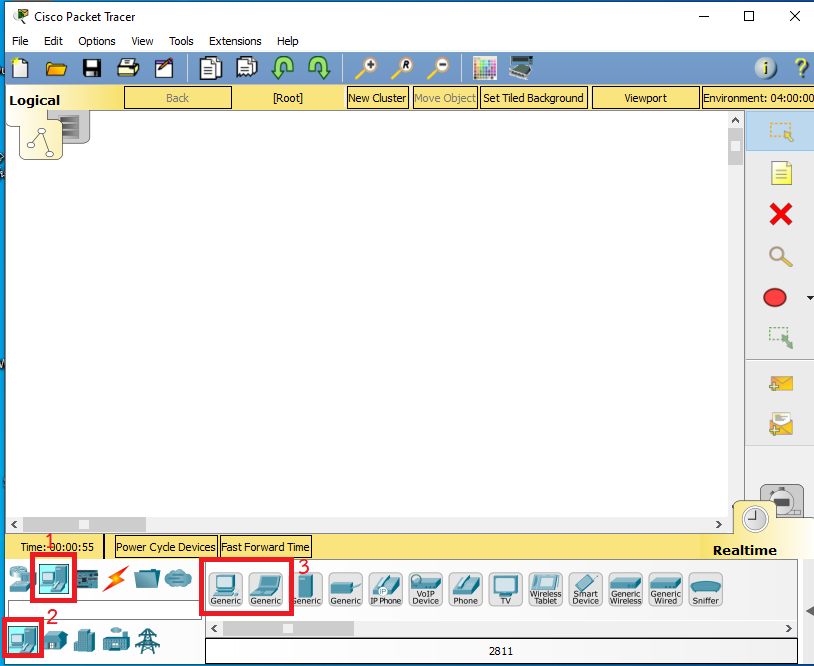
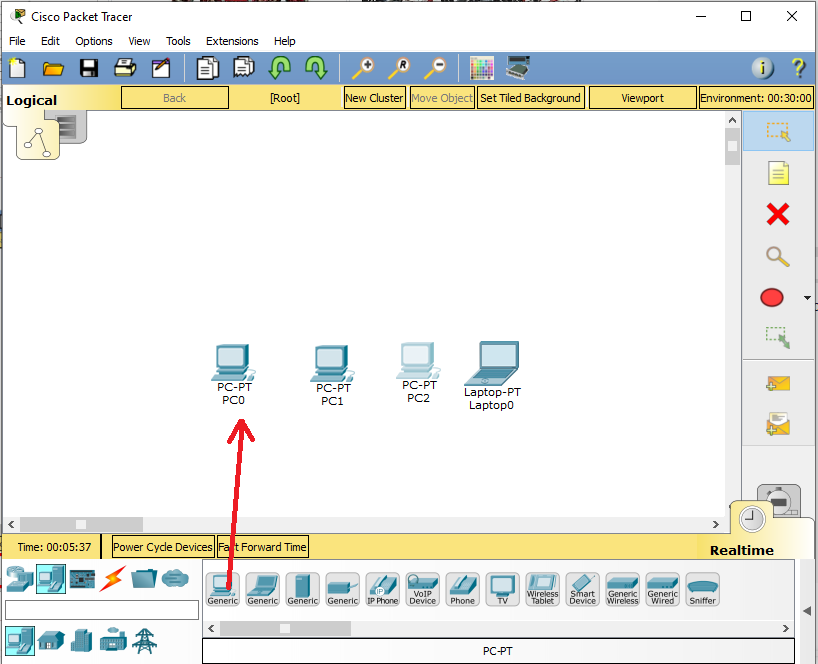
Drag and drop the device with the desktop view into the workspace in the right section.
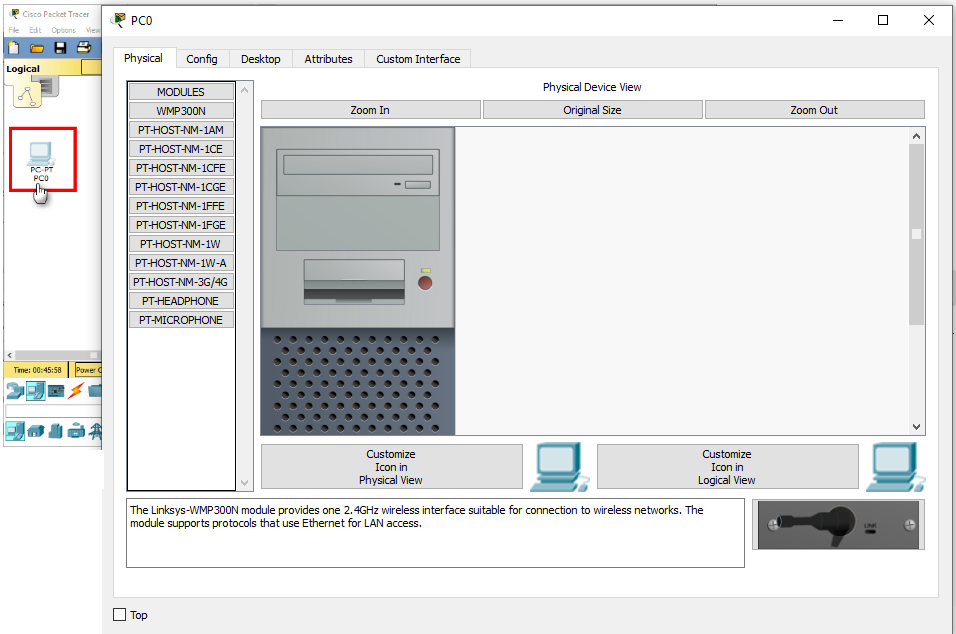
After adding a PC, you can open the corresponding hardware settings window by double-clicking on it. In this window, you can add modules to the PC
from the area on the left, as in the image below. You can also turn the PC on or off from the section shown in the illustration.
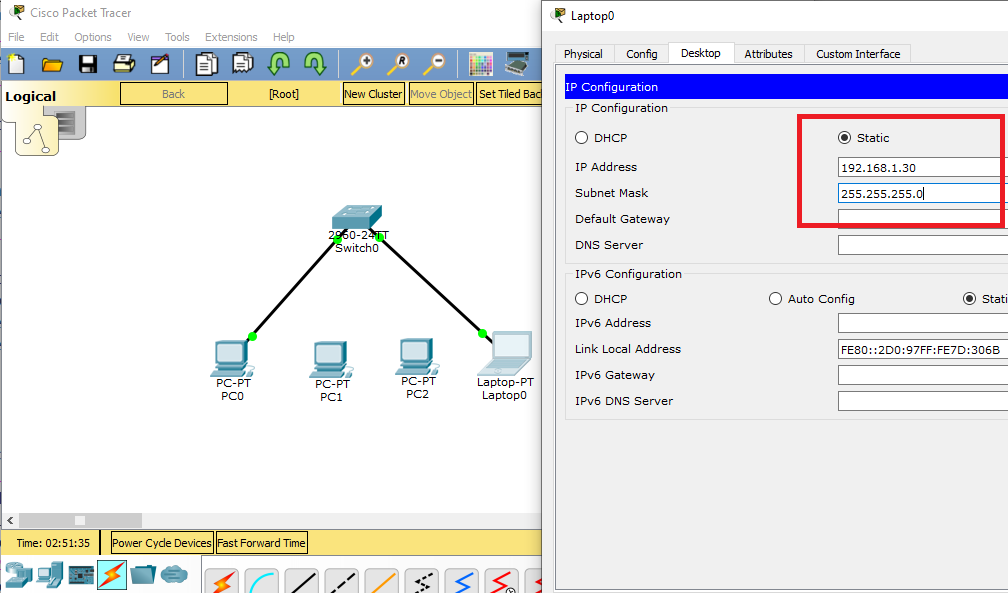
Step 2: How to Assign IP Addresses to Computers
You must assign IP addresses, subnet masks, and default gateway addresses to the PCs you add. For example,
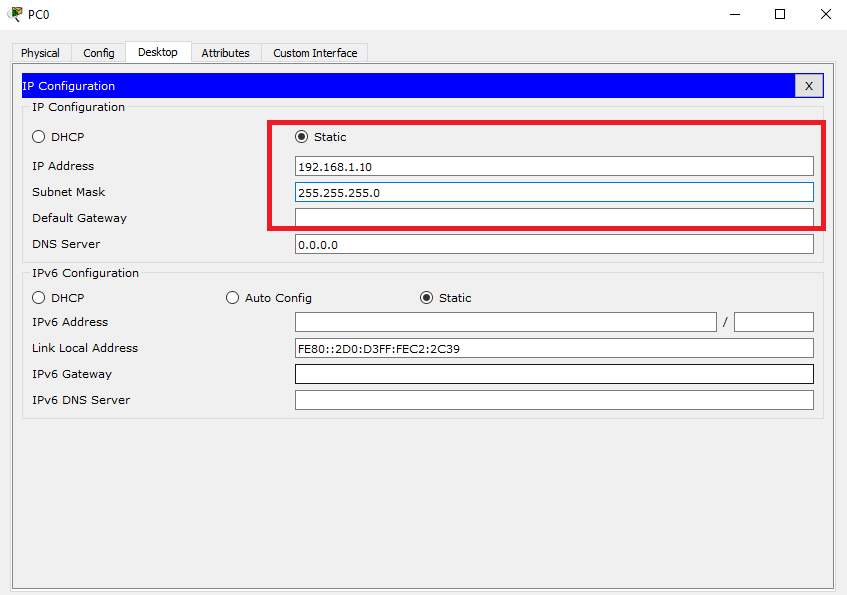
click to configure the TCP/IP settings of PC0, click the Desktop tab in the window that opens, and then click IP Configuration.

In the IP Configuration window, if you have a DHCP Server in your network topology, simply enable the DHCP option.
If you do not have a server, you must select Static to manually assign an IP address and configure the IP settings as follows.
Configure the IP address settings for PC0 as follows
You do not need to save your settings, because as soon as you click the X button, your settings will be saved.
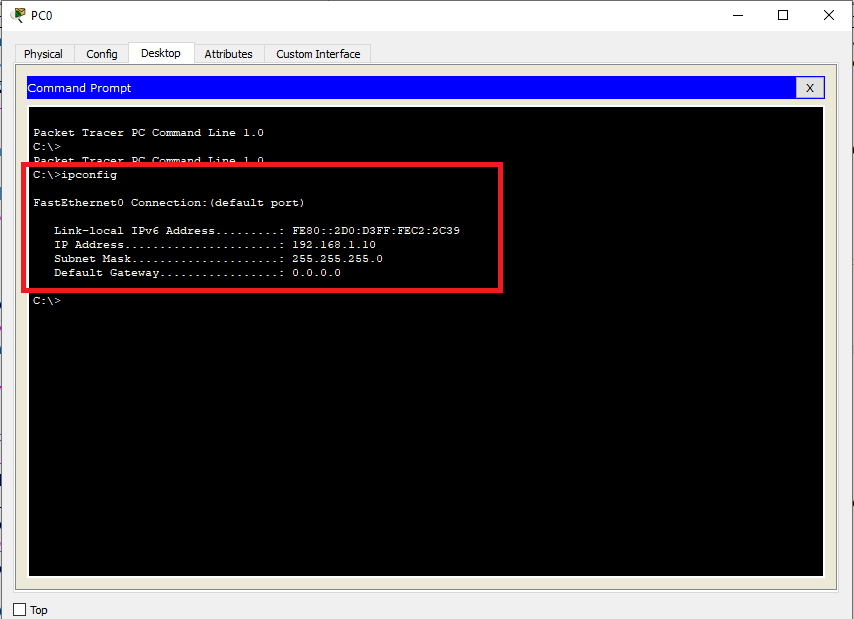
Now, from the PC0 properties, click on Command Prompt.
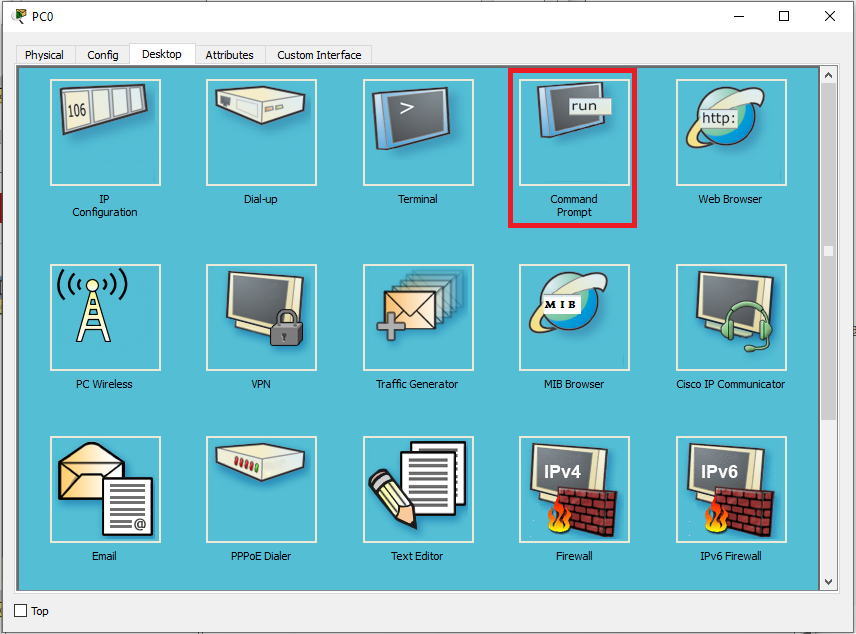
When you execute the ipconfig command on the CMD, you can see the IP settings of PC0.
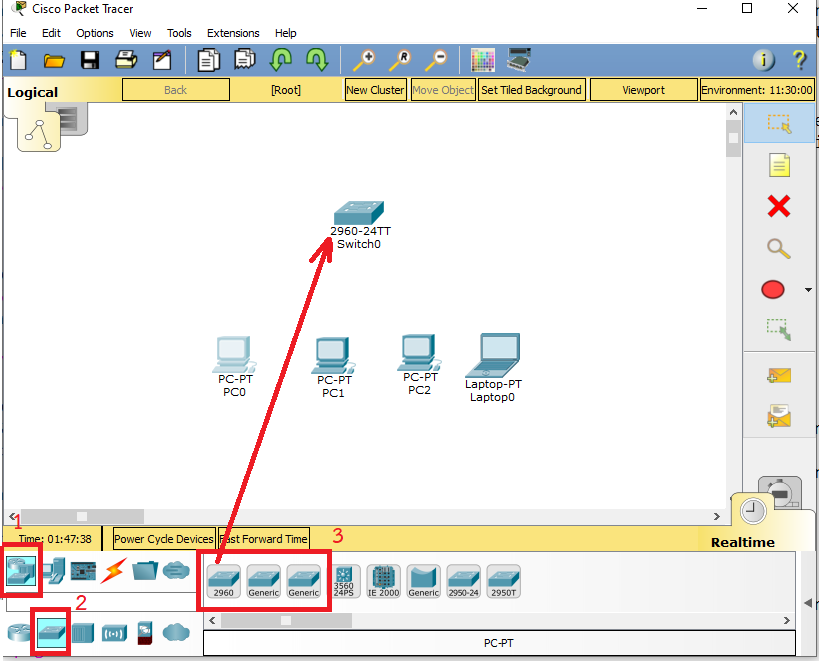
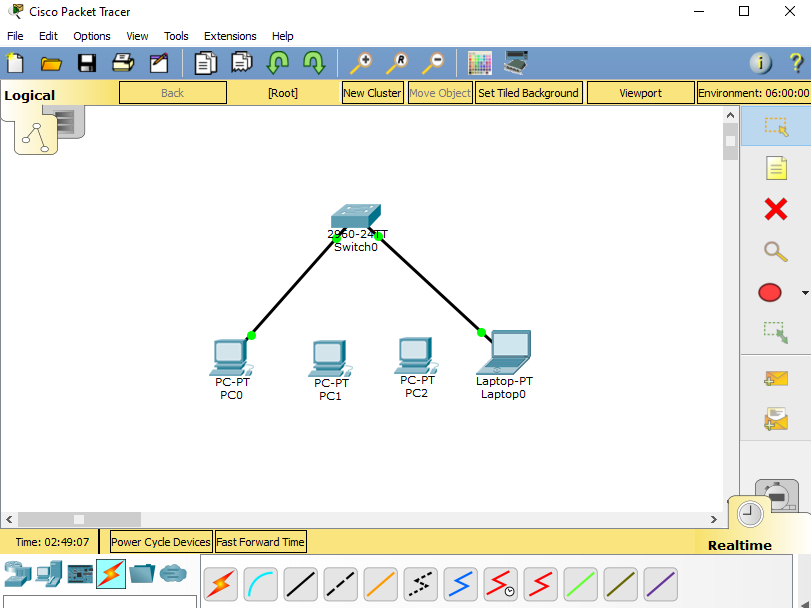
Step 3: How to Add a Cisco Switch
To add a Cisco Switch to the workspace, click (Network Devices) and click Switches from the options listed.
Under Network devices, click Switches.
After clicking the switches, the device models will be listed in the middle pane. Drag and drop the relevant Switch model from the workspace to your network.
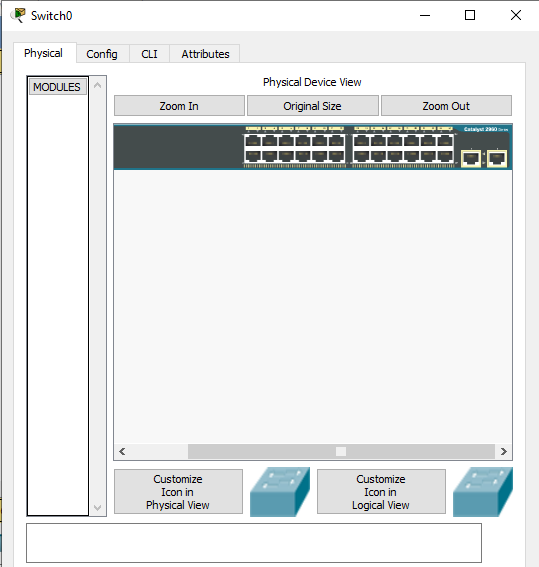
You can examine the physical appearance of the Switch in the Properties window.
Step 4: How to Cable Network Devices
After adding a PC and Switch to the workspace, you must connect these devices with a network cable.
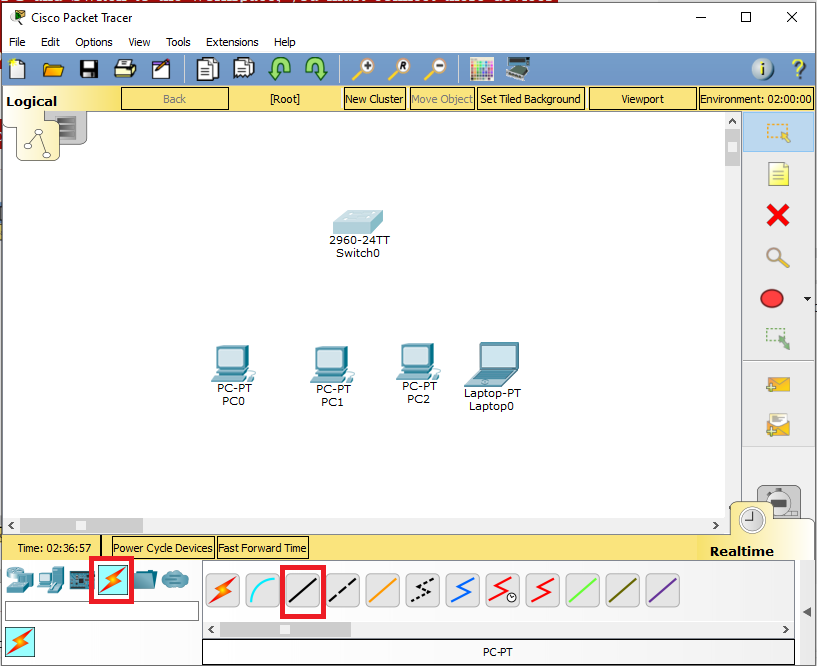
To cabling network devices in Packet Tracer, list the cable types that the program supports by clicking 1 and then 2 as shown in the image below.
After adding a PC and Switch to the workspace, you must connect these devices with a network cable.
To cabling network devices in Packet Tracer, list the cable types that the program supports by clicking 1 and then 2
as shown in the image below.
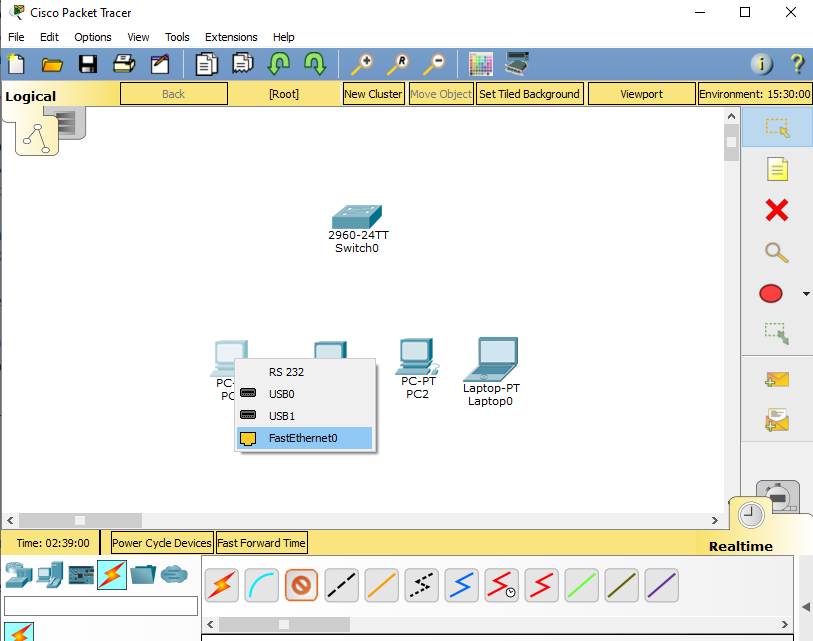
From the network cable types, select the straight-through cable type and click PC0.
Select the FastEthernet0 network card on PC0.
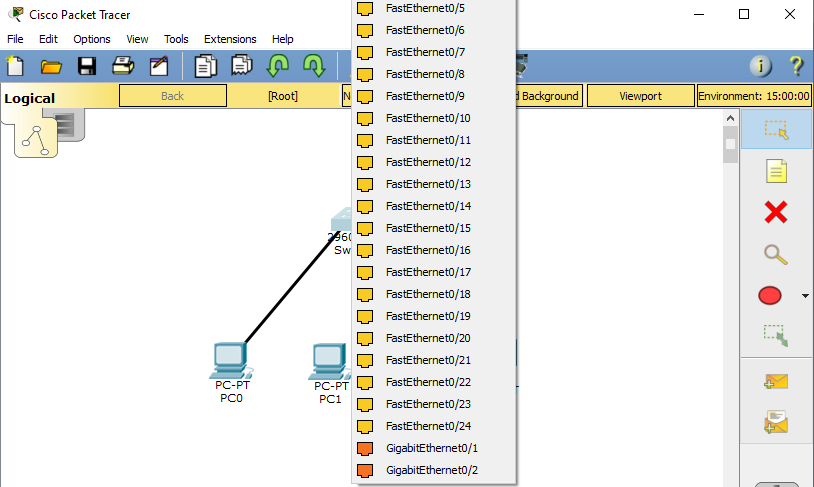
Now click Switch0 to connect the PC to the Switch and select any of the free ports listed.
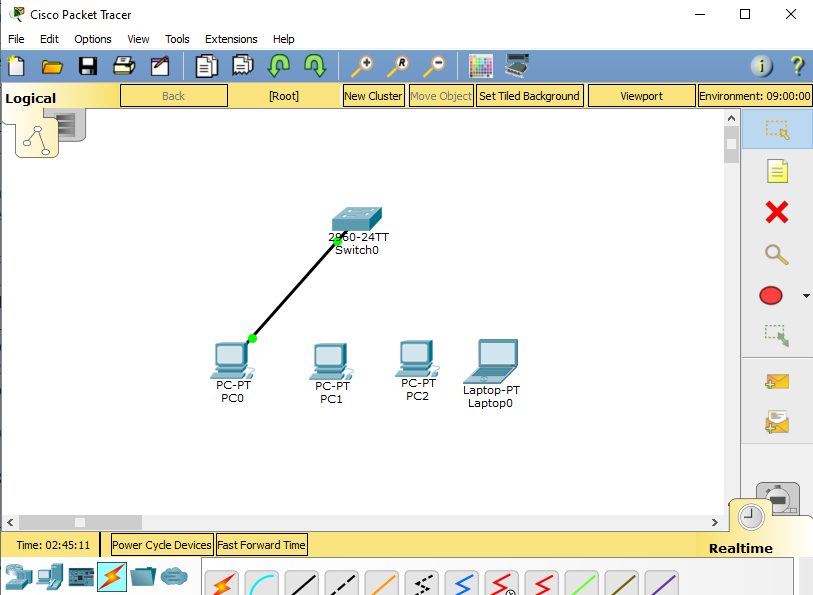
After connecting the network cable, the port status color between PC and Switch will be green as in the following image.
If the port is green, it means that the cable type is correct and working.
Add one laptop to the network topology and click the wiring option in the same way to connect it to the Switch.
Then plug the network cable into the FastEthernet0 interface of the Laptop.
Also, plug the other end of the cable into an empty port on the Switch.
Configure the IP settings of Laptop0 as Static as follows
Step 5: How to Test Ping Between Computers
To use ping in PT, you must open the properties of the client device and run the command prompt. Now,
to ping from Laptop0 to PC0,
execute the ping 192.168.10.10 command on the CMD.
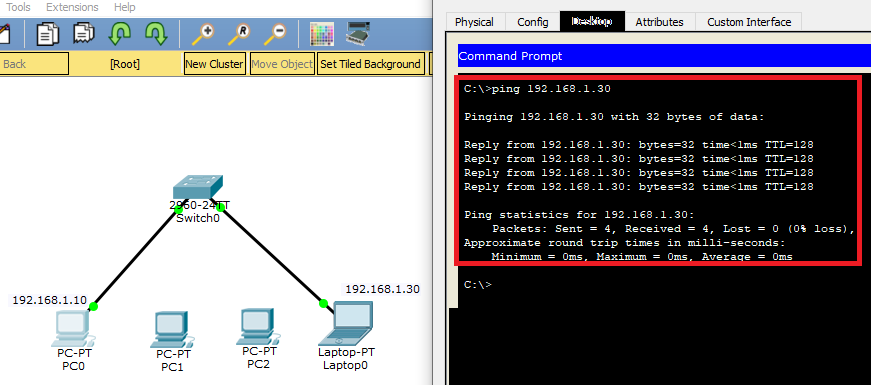
Pinging from Laptop0 to PC0 will be successful as follows.
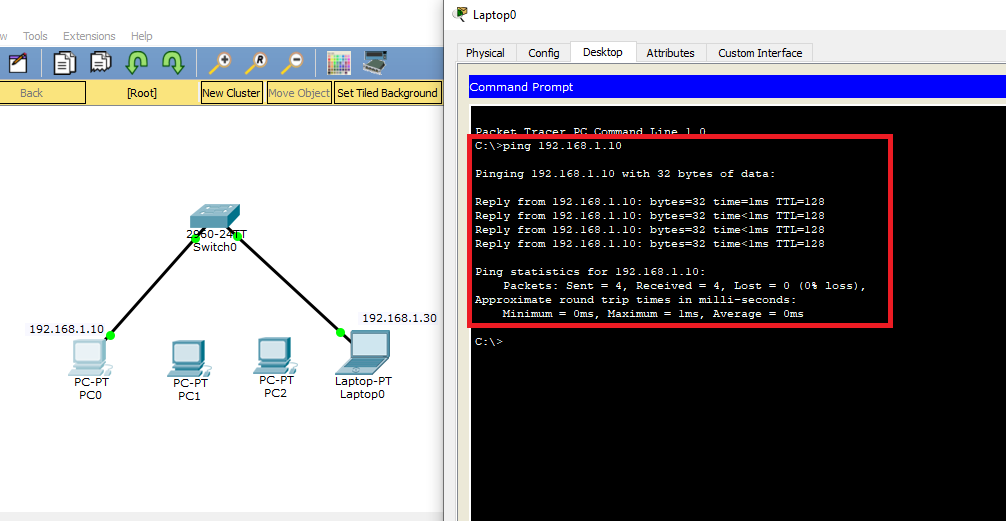
When you ping from PC0 to Laptop0, ping will also be successful.
Assignment
Add 2 PC and configs IP address 192.168.1.11/24 and 192.168.1.12/24. Test connection of network by use ping command.

Reference
How to Use Cisco Packet Tracer Step by Step

